Fields are what recipients actually fill in. The builder gives you thirteen field types and lets you assign each one to a signing party.
-
Add parties first
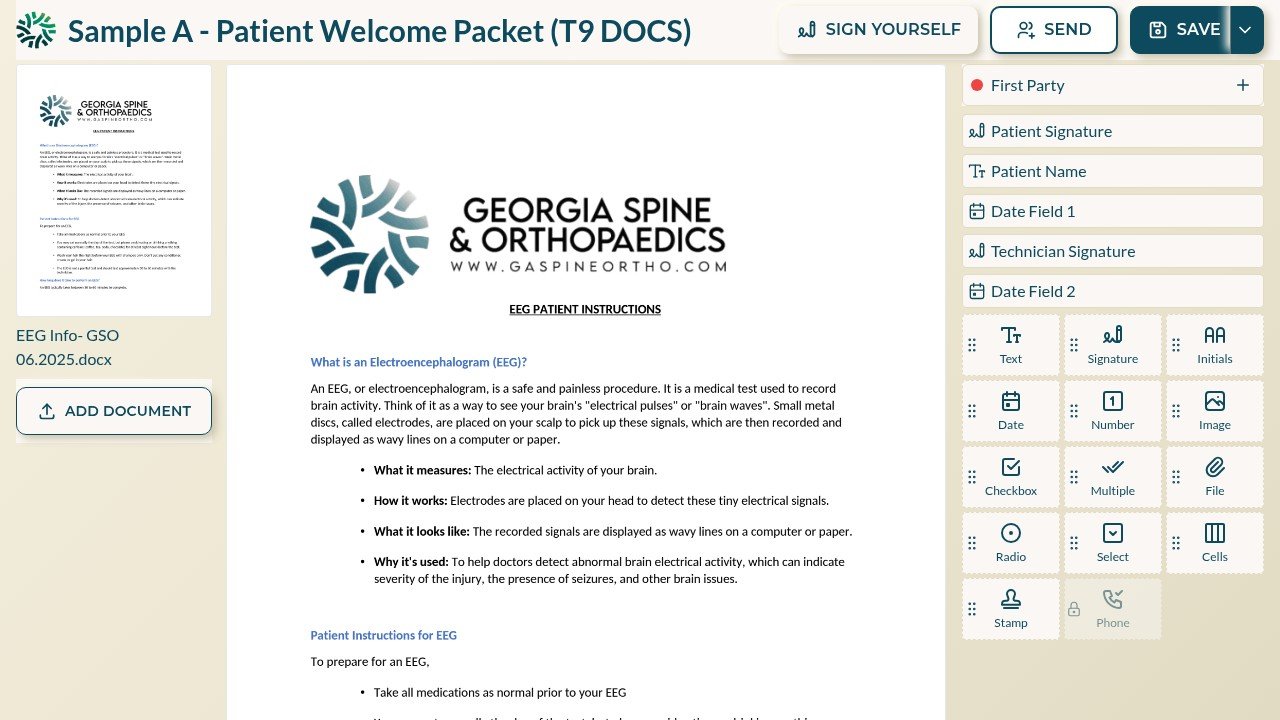
The panel on the right starts with the first signing party. Use the plus control next to the party name to add more — patient and technician, for example. Every field you place belongs to whichever party is selected, and each party sees only their own fields when signing.
-
Drag fields onto the page
Drag any type from the toolbox — Text, Signature, Initials, Date, Number, Image, Checkbox, Multiple, File, Radio, Select, Cells, or Stamp — onto the exact spot in the document. Resize by the corners; select a placed field to rename it, mark it required or optional, or set formatting such as date style.
-
Reorder and save
The field list above the toolbox shows every placed field in signing order — drag rows to reorder the flow recipients step through. SAVE keeps your work; the SAVE dropdown also holds the version history described in the Editing guides.